GNU Radio on the AIR-T
GNU Radio is a widely used free and open-source modular toolkit for developing and executing signal processing applications on software defined radio platforms, including the Deepwave Digital AIR-T. Prior to AirStack 0.5, GNU Radio ran natively under Python on the AIR-T; the versions of GNU Radio supported by this environment, however, were limited to 3.7 and older. With the release of AirStack 0.5, GNU Radio runs under the package and environment management system, Conda, which ensures that all the dependencies needed to run GNU Radio are installed in the execution environment. This approach also supports the newer and more capable GNU Radio 3.9.
Defining and Creating a GNU Radio Conda Environment
Before a Conda environment can be launched, it must be defined in a YAML file that includes the selection of the version of Python to be used in the environment. GNU Radio may be run with Python versions 3.6-3.9; your selection will depend on the specific version needed to support the other packages required for your application.
Note - NVIDIA provides binary builds for PyTorch and TensorRT that are compiled for Python 3.6; therefore, if you wish to use these packages, you will be limited to Python 3.6.
Following is sample content that you can copy to a YAML file you create, named gnuradio.yml for example, on your AIR-T; note that in this example the environment is named gnuradio and that Python 3.9 has been specified:
name: gnuradio
channels:
  - conda-forge
  - nvidia
  - defaults
  - file://opt/deepwave/conda-channels/airstack-conda

dependencies:
  - python=3.9
  - scipy
  - numpy
  - matplotlib
  - pip
  - soapysdr-module-airt
  - gnuradio
  - gr-wavelearner
The environment can now be created by executing the following command from the same folder containing the YAML file:
conda env create -f gnuradio.yml
This can take up to 5 minutes to complete
Activating the Conda Environment and Launching GNU Radio
Now that a Conda environment has been defined and created, it can be activated using the following command:
- Activate the gnuradio conda environment:
conda activate gnuradio
Now your Python environment has GNU Radio installed. You may validate the version by running:
(gnuradio) $ gnuradio-config-info --version

3.9.2.0
- Launch GNU Radio Companion: This command should launch the GNU Radio Companion GUI on your AIR-T.
gnuradio-companion
Run the Example Code
There are multiple examples provided in AirStack located in /home/<username>/Desktop/AIR-T_QuickStart_Apps/gnuradio. You can open these examples by selecting File -> Open and navigate to one of the two files in the AIR-T_QuickStart_Apps file on the Desktop:
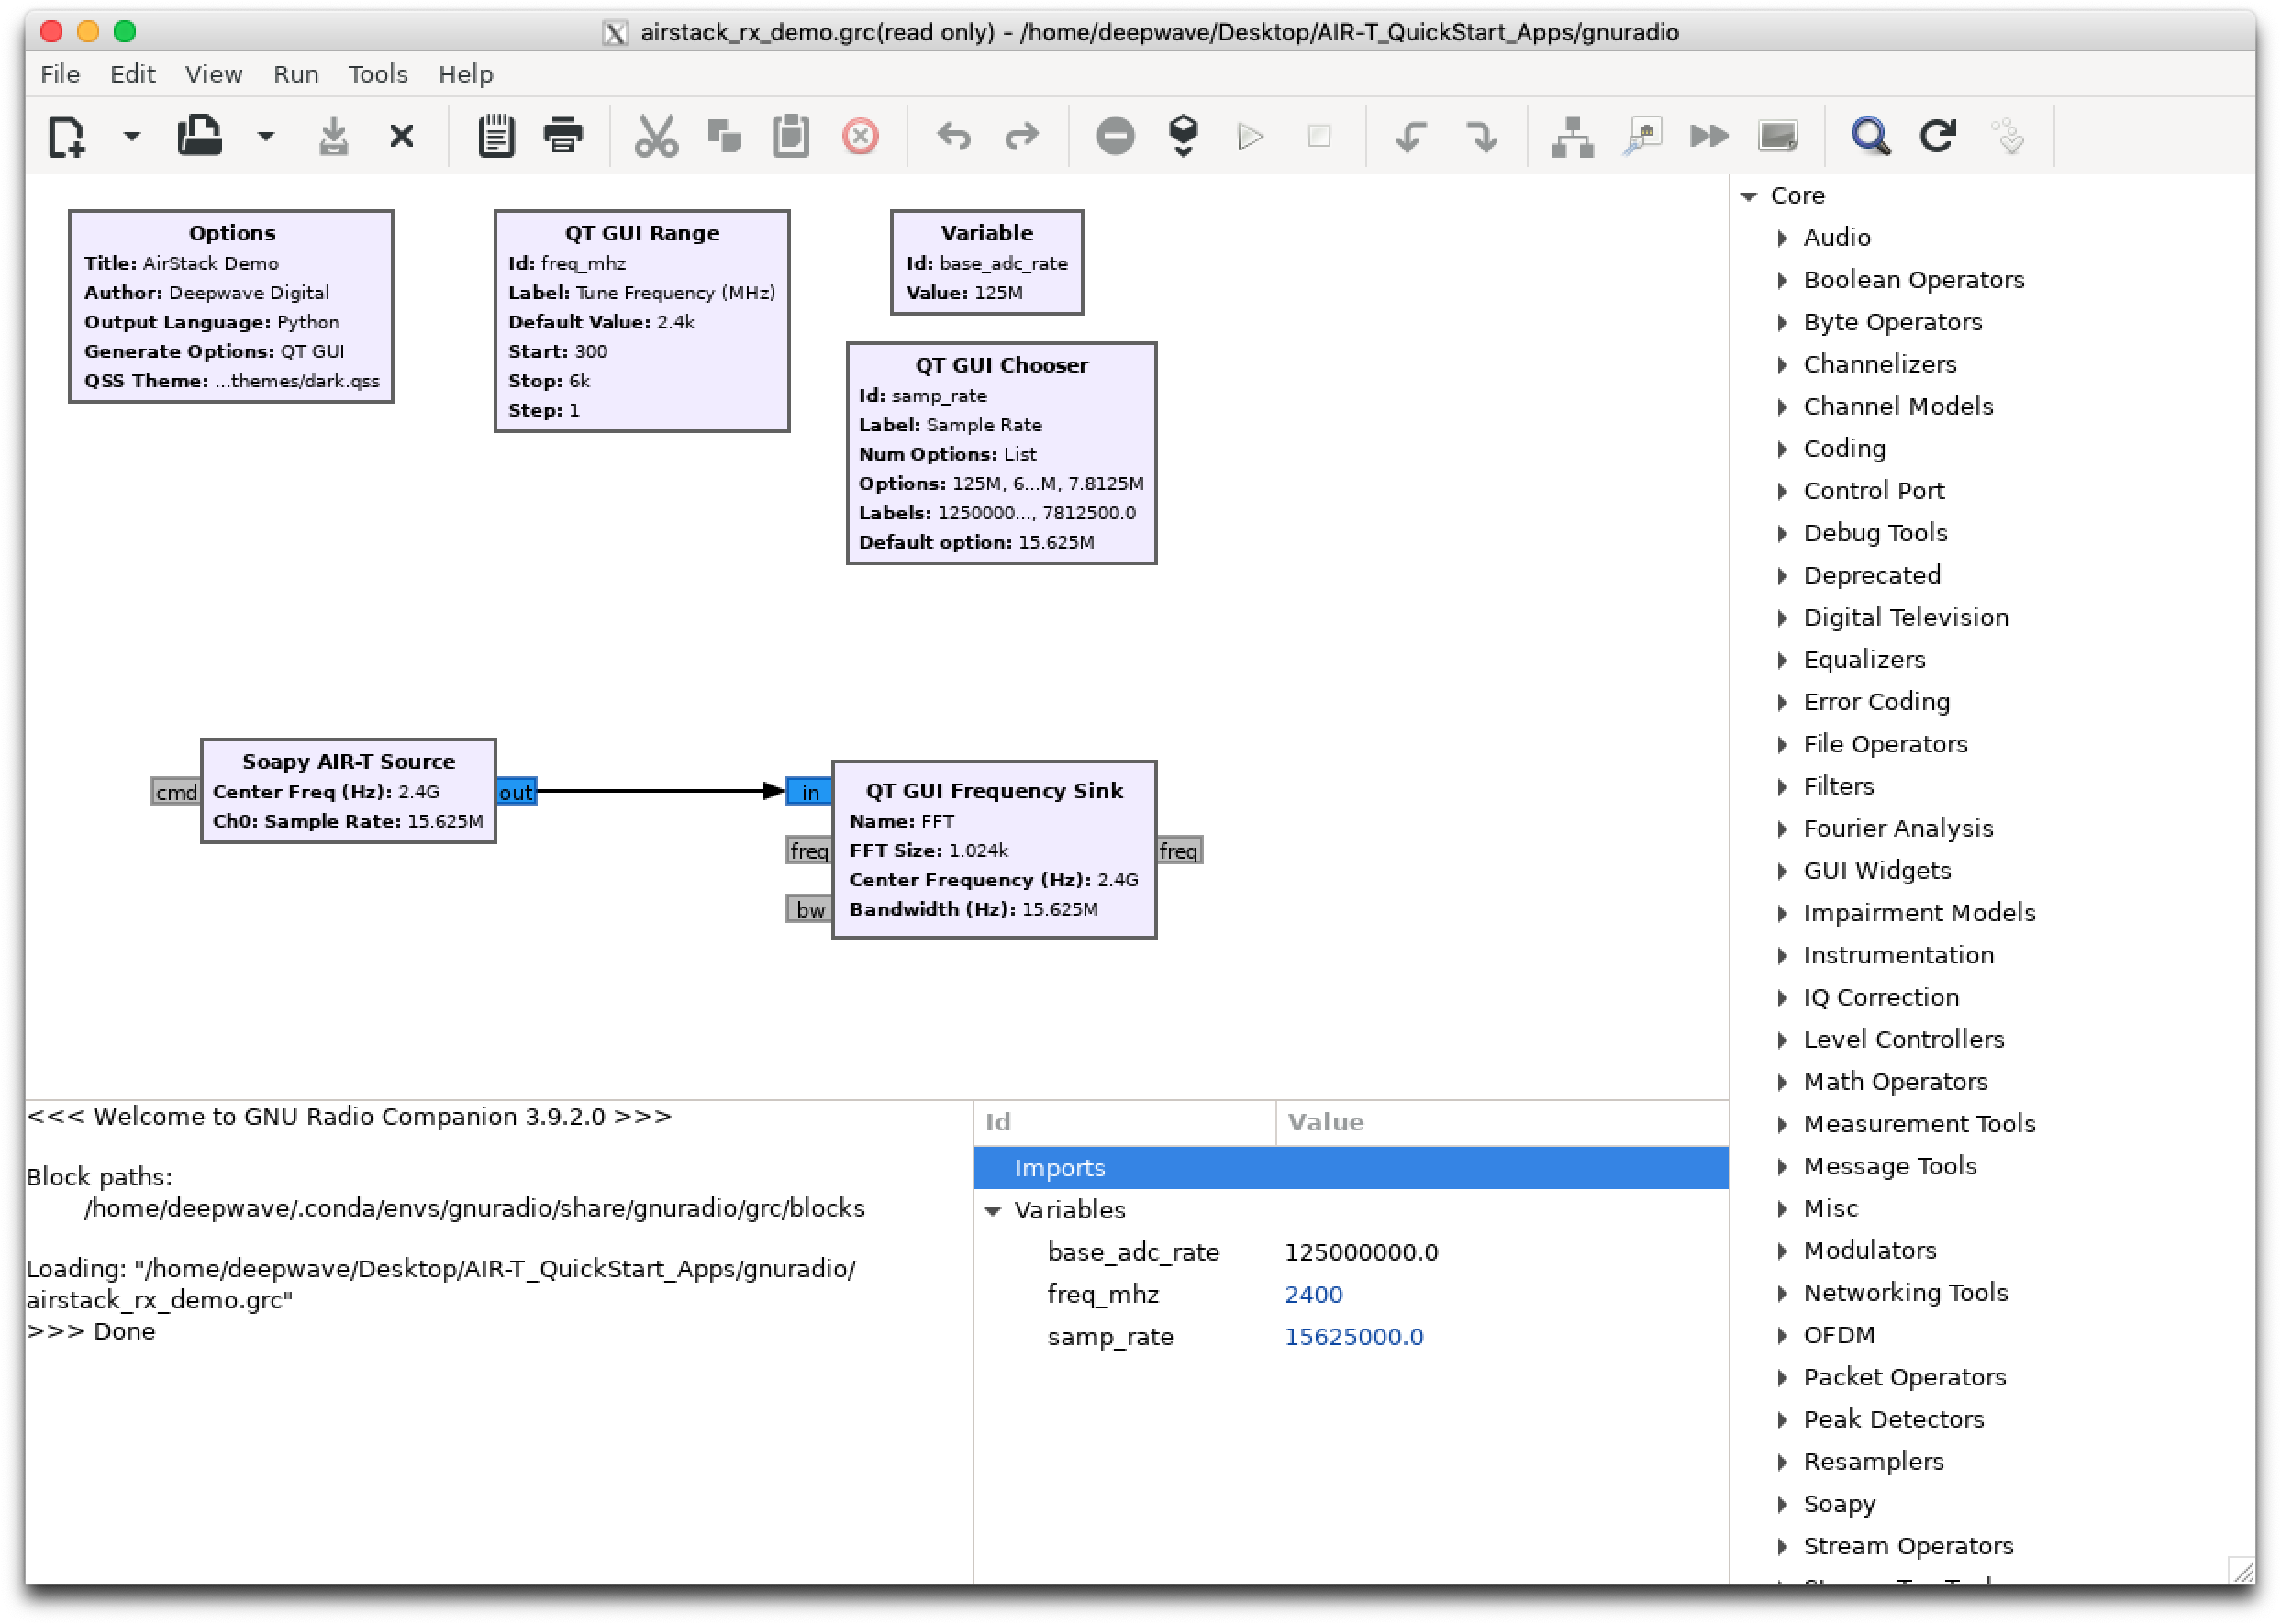
Receiver Demo
Use the airstack_rx_demo.grc file for a simple demonstration on how to receive signals on the AIR-T using GNU Radio. The Soapy AIR-T Source block should be used receiving signals using GNU Radio.
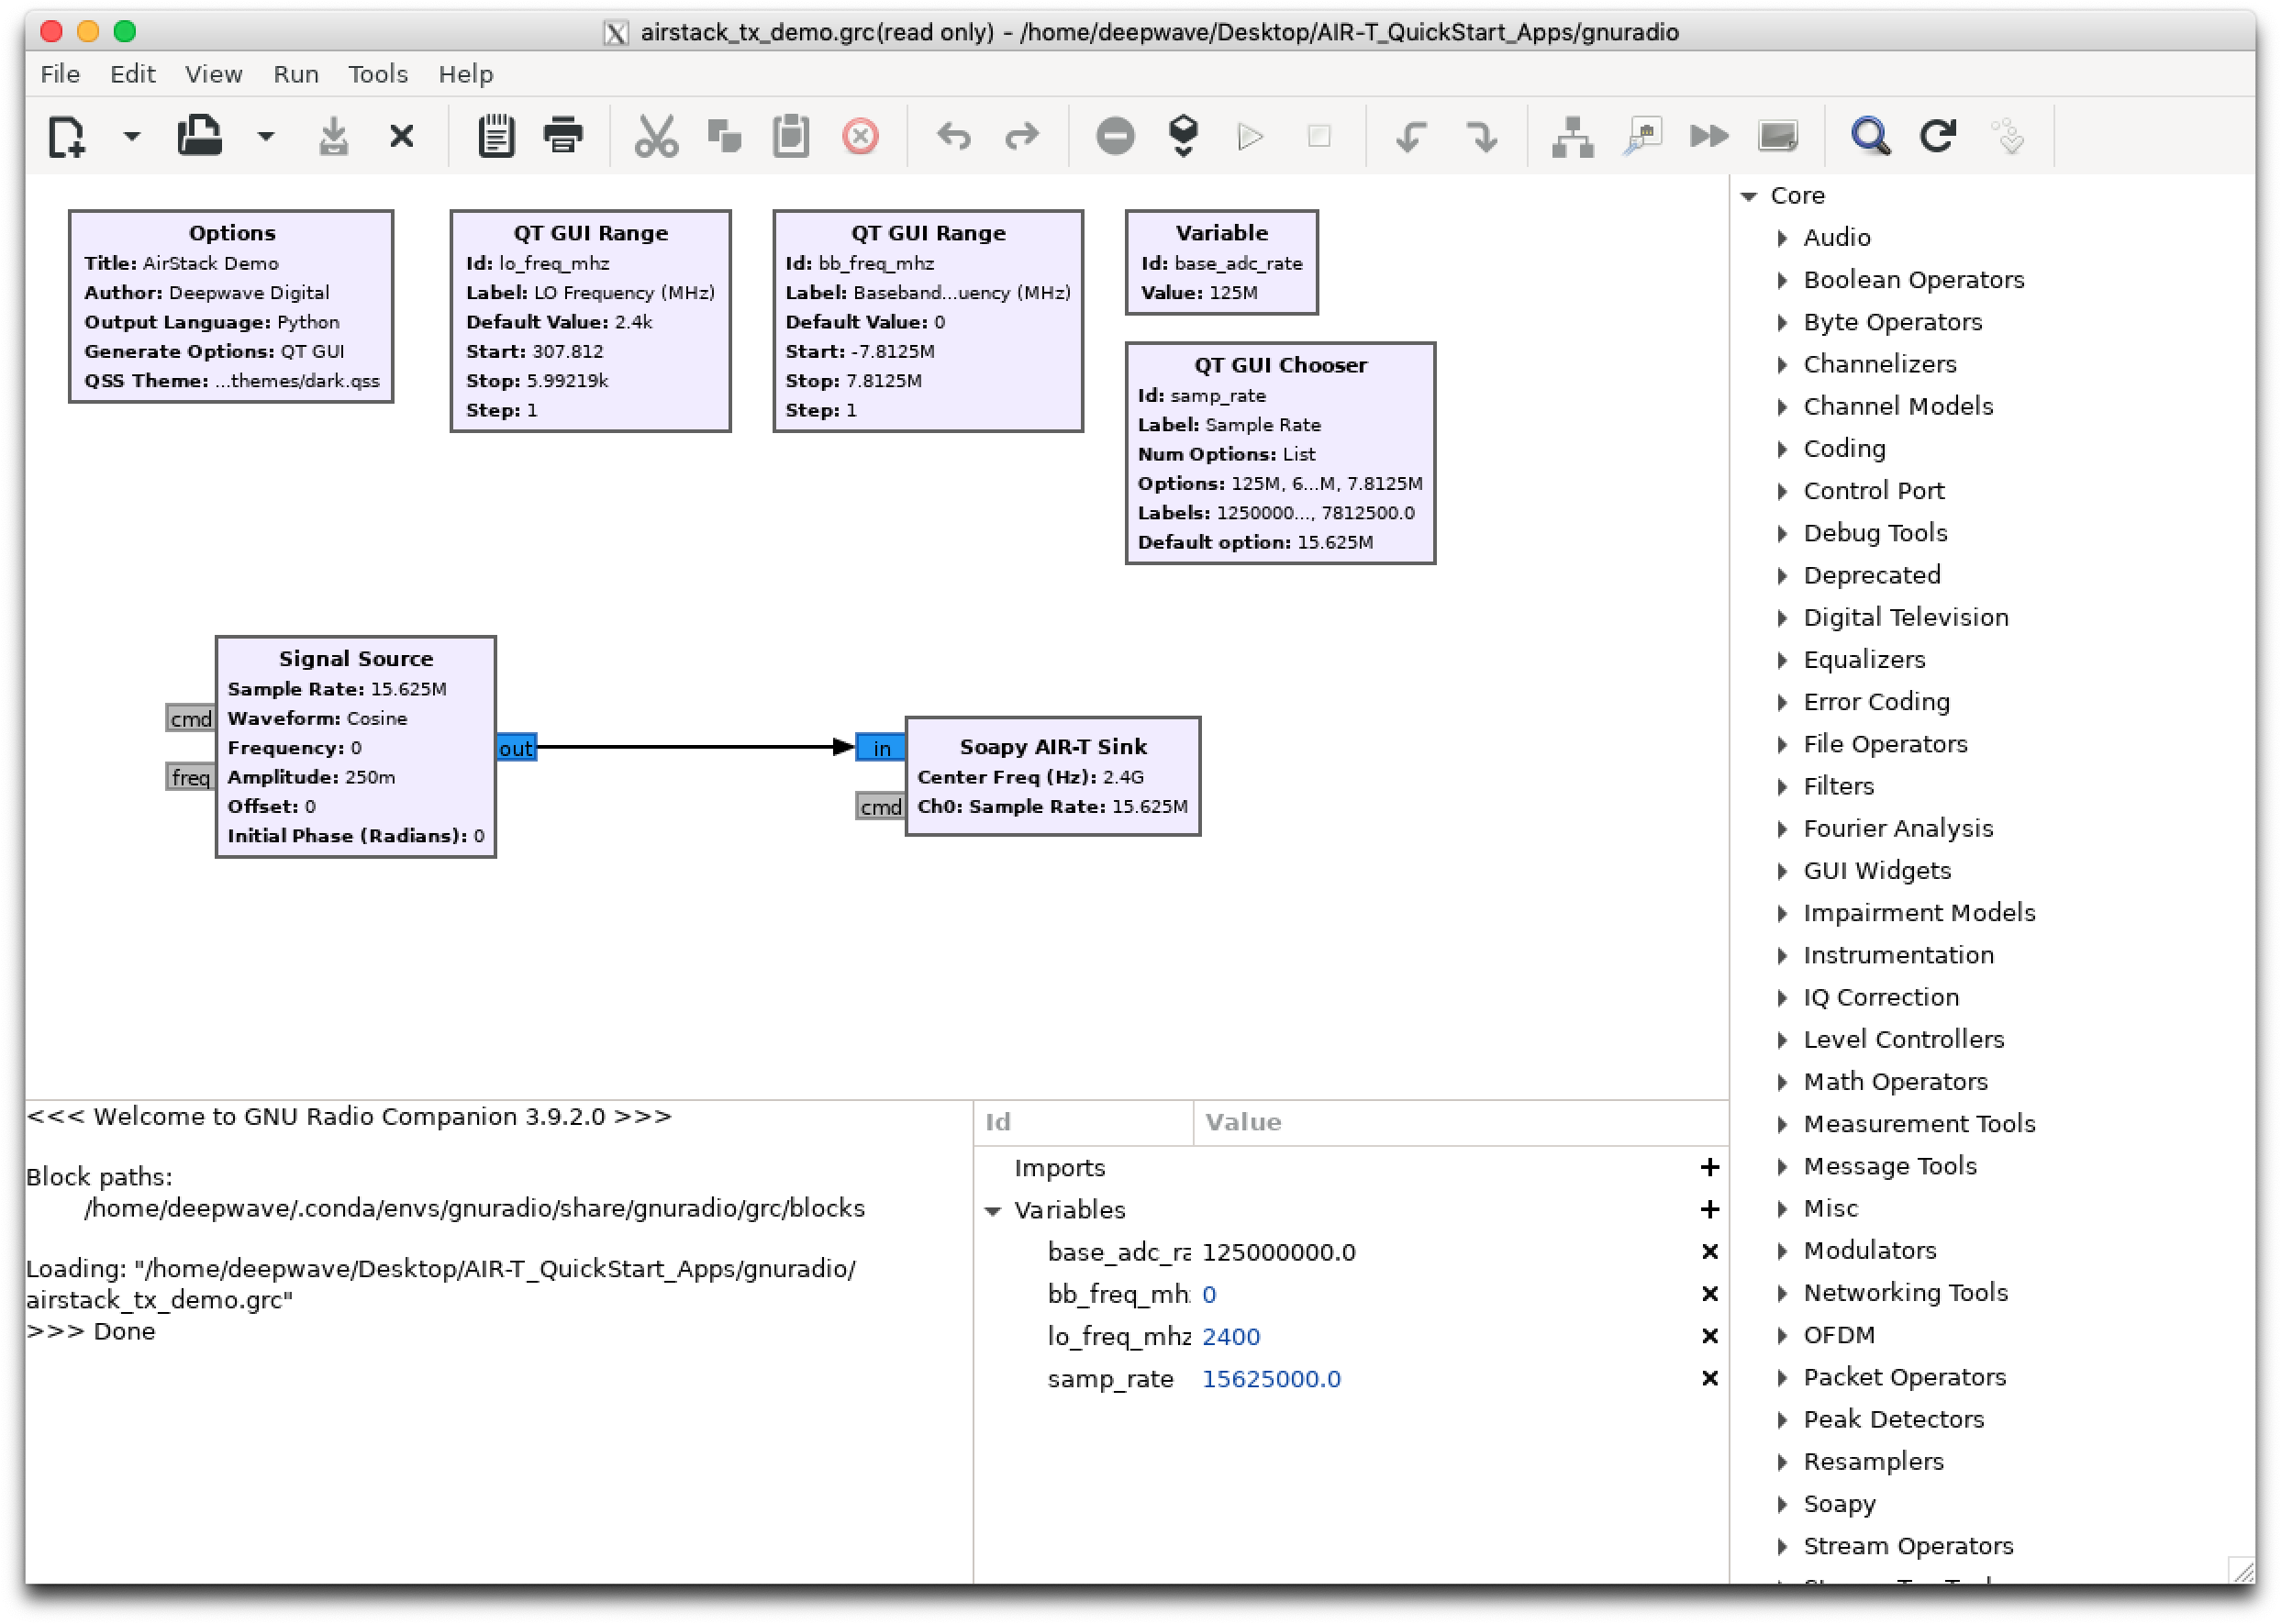
Transmitter Demo
Use the airstack_tx_demo.grc file for a simple demonstration on how to transmit signals on the AIR-T using GNU Radio. The Soapy AIR-T Sink block should be used for transmitting signals using GNU Radio.
Modify the Example Code
Next you may modify the either of these example for your needs. Note that the AIR-T_QuickStart_Apps folder links to a read-only directory. If you wish to modify the one of these files, you must save it to a different location.